


 12.10.2026
 6 görüntülenme
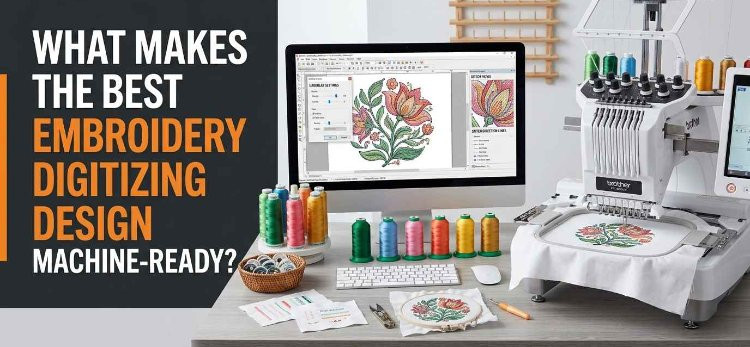
A machine-ready embroidery file is more than a digital image converted into stitches. It contains carefully planned instructions that tell an embroidery machine how to reproduce a design on fabric. The best embroidery digitizing design combines appropriate stitch types, balanced density, correct sequencing, suitable underlay, and dimensions that match the intended product.
A logo may look clear on a computer screen but produce uneven lettering, fabric puckering, gaps, or thread breaks during embroidery if the file is not prepared correctly. These issues can affect production time, material costs, and the finished appearance of embroidered products.
Understanding what makes an embroidery design machine-ready helps beginners, embroidery businesses, and professional operators choose better files and prepare artwork for more consistent results. This guide explains the main technical factors, common problems, and practical steps involved in creating a reliable embroidery file.
What Is a Machine-Ready Embroidery Digitizing Design?
A machine-ready embroidery digitizing design is a digital file containing stitch instructions that a compatible embroidery machine can interpret. It defines the placement and sequence of stitches, stitch types, thread color changes, trims, and other machine movements supported by the selected format.
Unlike a JPG or PNG image, which displays artwork as pixels, an embroidery file contains information about how the design should be stitched.
For example, a company logo may contain text, borders, and several filled shapes. During digitizing, each element must be converted into appropriate stitches and arranged in a sequence that supports clean stitching.
Common embroidery file formats include DST, PES, JEF, EXP, and VP3. The correct format depends on the embroidery machine and its software requirements. A file may contain a well-digitized design but still be unusable on a machine that does not support its format or dimensions.
Machine readiness also depends on the intended fabric, embroidery size, stabilizer, thread, and machine setup. A file should therefore be evaluated according to its intended application rather than simply judged by its appearance on a screen.
Key Features of the Best Embroidery Digitizing Design
Several technical elements influence whether an embroidery design can be stitched accurately and efficiently.
1. Correct Stitch Type Selection
Different design elements require different stitch structures. Choosing suitable stitches helps preserve the artwork's shape while controlling thickness and coverage.
Satin stitches are commonly used for lettering, narrow borders, and slim shapes. They create a smooth surface when the width and stitch length are appropriate.
Fill stitches cover larger areas with rows of stitches. They are useful for broad shapes, backgrounds, and sections that require consistent coverage.
Running stitches are often used for fine lines, lightweight details, and outlines that do not require a dense stitched surface.
Underlay stitches form a foundation beneath the visible stitches. They can support the fabric, improve coverage, and help the upper stitches maintain their shape.
A quality digitizer selects stitches according to the shape, dimensions, fabric, and required appearance. Applying one stitch type to every part of a design can result in unnecessary bulk or poor definition.
2. Balanced Stitch Density
Stitch density describes how closely stitches are placed within a design area. It plays an important role in coverage, flexibility, and the amount of thread used.
If the density is too high, the design may become stiff or bulky. Excessive stitching can also contribute to thread breaks, needle stress, and fabric damage.
If the density is too low, the fabric may show through filled areas, leaving the design looking incomplete.
The right density depends on factors such as fabric thickness, thread size, stitch type, design dimensions, and stabilizer selection. Lightweight fabrics may require a different approach from thick jackets or structured caps.
A machine-ready file should use enough stitches to provide the required coverage without adding unnecessary thread. Density should be adjusted according to the material and tested when the design will be used for production.
3. Appropriate Underlay Structure
Underlay is stitched before the visible top layer. It helps stabilize the design area and provides a foundation for the upper stitches.
Different underlay structures serve different purposes. Some help anchor the fabric, while others support satin columns or improve the coverage of filled areas.
Without suitable underlay, stitches may sink into the fabric, coverage may become uneven, or design elements may lose their intended shape. On the other hand, excessive underlay can increase thickness and create an unnecessarily stiff result.
The appropriate underlay depends on the stitch type, design size, fabric, and finished appearance. A well-prepared file balances foundation stitches with the requirements of the top stitching.
4. Proper Stitch Direction
Stitch direction affects the texture, appearance, and behavior of an embroidered design. It also influences how the thread reflects light across different sections.
For example, two adjoining shapes stitched at different angles may appear more visually distinct than shapes stitched in the same direction. Changing stitch angles can also help a digitizer manage large filled areas and create a more considered stitch plan.
Poor stitch direction may contribute to uneven texture, visible gaps, or distortion. A professional digitizer plans angles based on the artwork and the material rather than relying on a single direction for the entire design.
5. Accurate Pull Compensation
During embroidery, thread tension and stitch formation can pull fabric inward. As a result, the finished stitched area may become narrower or smaller than its intended shape.
Pull compensation adjusts certain design dimensions to account for this movement. It can help reduce gaps between adjoining elements and improve the appearance of outlines and lettering.
However, the amount of compensation depends on the fabric, stitch type, density, and design dimensions. Too little compensation may leave gaps, while too much can make the design appear oversized or distorted.
A machine-ready embroidery file should account for expected fabric movement without applying the same adjustment to every design element.
Why Stitch Sequencing Matters
Stitch sequencing determines the order in which the machine embroiders the different parts of a design. A well-planned sequence can reduce unnecessary machine movement, limit avoidable trims, and improve alignment between adjoining sections.
For example, a logo containing several filled shapes and an outline needs a suitable stitching order. If the outline is embroidered too early, later stitching may cover or distort it. If separate elements are arranged poorly, the machine may travel unnecessarily across the design.
A carefully planned sequence can also help manage overlapping sections and color changes. The correct order depends on the artwork, stitch types, fabric, and intended finish.
Color sequencing is particularly important for multicolor designs. Grouping compatible sections can reduce unnecessary thread changes, but the sequence must still preserve the design's structure and appearance.
The goal is not simply to minimize machine movements. The sequence must also support accurate registration, clean edges, and reliable stitching.
How Design Size Affects Machine Readiness
A digitized design must be prepared for its intended dimensions. A file that works well at one size may not produce the same result when reduced or enlarged substantially.
Small Designs Require Special Attention
Small logos, cap designs, and embroidered lettering often contain limited space for detail. Thin lines and tiny text may become difficult to reproduce because thread has physical thickness and fabric can shift during stitching.
When reducing a design, some details may need to be simplified, enlarged, or removed. Small lettering may require a suitable font and adjusted spacing to remain readable.
Simply shrinking the original design does not guarantee a usable result. The stitch plan may need to be revised for the smaller dimensions.
Large Designs Need Suitable Stitch Planning
Large jacket-back designs and broad decorative patterns may require careful planning to control stitch count, fabric movement, and thread buildup.
Large filled areas can become heavy if the density is excessive. They may also require different stitch directions or a revised sequence to manage the material.
Before digitizing, confirm the available embroidery area and hoop dimensions. The finished design should fit the product without exceeding the machine's supported working area.
Choosing the Right Embroidery File Format
File compatibility is another important part of machine readiness. Common formats include:
DST: Frequently used in commercial embroidery workflows.
PES: Used by many Brother and Baby Lock embroidery machines.
JEF: Associated with Janome embroidery systems.
EXP: Used by various embroidery systems, depending on the machine and software.
VP3: Supported by certain embroidery machines and software applications.
These examples are not universal compatibility guarantees. Different machine models support different formats, and some workflows require additional software or conversion.
Before ordering a digitized design, check the machine's documentation and confirm the required file type. Also verify the maximum design dimensions, hoop size, and any limitations on stitch count or file handling.
Changing the file extension alone does not convert a design correctly. Proper conversion must preserve the embroidery instructions in a format that the target system can read.
Common Problems That Make an Embroidery File Difficult to Stitch
A file may appear acceptable in a preview but produce problems during actual embroidery. Recognizing the symptoms can help identify whether the cause lies in the digitizing, materials, or machine setup.
Fabric Puckering
Puckering occurs when the fabric gathers around the embroidered area. Possible causes include excessive stitch density, unsuitable stabilizer, poor hooping, incorrect tension, or a stitch plan that does not suit the material.
Use an appropriate stabilizer and hooping method, and check the machine settings. If the problem continues in the same design areas, review the density, underlay, and compensation.
Frequent Thread Breaks
Thread breaks can result from needle damage, incorrect threading, excessive tension, poor-quality thread, or dense and poorly structured stitching.
First, inspect the machine, needle, thread path, and tension. If breaks repeatedly occur at the same point in the design, the digitized file may require further review.
Gaps in Filled Areas
Visible gaps may occur because of fabric movement, insufficient coverage, poor stitch direction, or unsuitable compensation.
The solution may involve adjusting the stitch plan, but fabric type, stabilizer, and machine setup should also be checked. A test sew can help identify the source of the problem.
Uneven Lettering and Borders
Lettering may look distorted when it is too small, poorly spaced, or unsuitable for the chosen stitch type. Borders can become misaligned when the fabric shifts or the stitch sequence does not account for movement.
Review the finished design at its actual dimensions. If the lettering is difficult to read in the preview, it may need to be simplified before digitizing.
How to Prepare Artwork for Machine-Ready Digitizing
The quality of the original artwork can influence the digitizing process. Clear references make it easier to identify shapes, lettering, and important details.
Before submitting artwork, follow these steps:
Provide a clear image. Use the highest-quality artwork available. Vector files can be particularly useful when the design contains clean shapes and text.
Confirm the finished size. State the intended width and height rather than leaving the dimensions uncertain.
Identify the target fabric. Mention whether the design will be used on cotton, fleece, denim, caps, jackets, towels, or another material.
Specify the machine format. Confirm which embroidery file type your equipment supports.
Explain important details. Highlight any lettering, borders, or color sections that must remain recognizable.
Share production requirements. If the design will be stitched repeatedly for customer orders, explain the intended use and expected consistency.
Request a test sew when possible. Testing the design on similar material helps reveal issues before full production.
Providing this information before digitizing helps the designer make better technical decisions and reduces avoidable revisions.
How to Test Whether an Embroidery Design Is Machine-Ready
A test sew is one of the most useful ways to assess an embroidery file. It shows how the design behaves with real thread, fabric, stabilizer, and machine settings.
Start by confirming that the design fits within the selected hoop and that the file opens correctly on the embroidery machine. Prepare the material using an appropriate stabilizer and hooping method.
During the test, check whether the lettering is readable, filled areas have suitable coverage, outlines align correctly, and thread changes occur as expected. Watch for excessive fabric puckering, thread breaks, loose stitches, and unnecessary thread buildup.
If a problem appears, determine whether it comes from the file or the machine setup. For example, incorrect threading may cause tension issues, while repeated gaps in the same section may indicate a need for digitizing adjustments.
Change one factor at a time and test again. Recording the successful settings can help maintain consistency across future production runs.
When Should You Use Professional Embroidery Digitizing Services?
Professional embroidery digitizing can be particularly helpful when working with complex logos, small lettering, detailed illustrations, large jacket-back designs, or artwork intended for repeated commercial production.
A professional digitizer can plan the stitch types, underlay, density, direction, and sequence according to the design's intended application. They may also adjust the file for a specific fabric or machine requirement.
When evaluating a digitizing provider, review examples of completed work, confirm the supported file formats, ask about revisions, and provide clear production specifications. If you need the design for caps, uniforms, patches, or other specialized products, mention that before the work begins.
Professional digitizing can improve the quality of the stitch plan, but it cannot eliminate every embroidery problem. Correct needles, thread, stabilizer, hooping, tension, and machine maintenance remain important.
Conclusion
The best embroidery digitizing design is machine-ready when its stitch types, density, underlay, direction, sequencing, and dimensions are suited to the intended material and embroidery equipment. File compatibility and careful artwork preparation also help ensure that the design can be used correctly.
Before starting production, check the file format, review the design at its actual size, and perform a test sew on similar fabric. If problems occur, examine both the digitizing and the machine setup to identify the appropriate correction.
For businesses and individuals seeking professionally prepared embroidery files, ZDigitizing.net can be considered when comparing digitizing services for logos, lettering, patches, and other machine embroidery projects.
Frequently Asked Questions
Q1: What makes an embroidery digitizing design machine-ready?
A machine-ready design contains suitable stitch types, balanced density, appropriate underlay, correct sequencing, and dimensions compatible with the embroidery machine. It should also be prepared for the intended fabric and application.
Q2: Does every embroidery file work on every machine?
No. Machines support different file formats and may have different hoop-size and design-dimension limitations. Always confirm compatibility with the machine manufacturer or its documentation.
Q3: How can I check the quality of a digitized embroidery file?
Review the stitch structure, design dimensions, lettering, density, and file compatibility. A test sew on similar fabric is one of the best ways to evaluate actual stitching performance.
Q4: Why does my embroidery file cause thread breaks?
Thread breaks can result from incorrect threading, needle problems, excessive tension, poor-quality thread, or issues within the stitch plan. Inspect the machine first, then review the design if the problem repeatedly occurs in the same area.
Q5: Can I resize a machine-ready embroidery design?
Resizing may be possible, but significant changes can affect stitch spacing, lettering, density, and detail. A design may need to be adjusted or redigitized for the new dimensions.
Q6: What is the purpose of underlay in embroidery digitizing?
Underlay creates a foundation beneath the visible stitches. It can stabilize the material, support the top stitching, and improve coverage when selected appropriately for the fabric and design.
Q7: Is a higher stitch count better for embroidery?
Not necessarily. Excessive stitches can increase production time, thread usage, and fabric stress. The correct stitch count depends on the design's dimensions, required coverage, and material.
Q8: Should I test an embroidery file before using it for customer orders?
Yes. A test sew helps identify issues with lettering, coverage, alignment, thread breaks, and fabric behavior before multiple products are embroidered. Testing is especially useful for repeat orders and commercial production.
Yorumlar (0)
Bu gönderi için henüz bir yorum yapılmamış.
Yorum Bırakın